Infographic: Choosing the Best Compost Method
What is the best compost method? In this infographic, discover the methods successful composters are using in their homes and gardens. If you want to compost, there’s a way to do it no matter where you live!
On-site or off, inside or out, simple or complex, this flowchart can help you navigate the possibilities. Below the infographic, you’ll find a short definition of each method and links to additional resources.
CLICK HERE TO GET A PRINTABLE PDF VERSION
What is the best compost method for you?
The best compost method is the one that fits your goals, space, and sense of style. If you’re not sure, I encourage you to start with your “best guess.” You can always change your mind! The key is to get started.
Taking action is hands-down the best way to figure this out. You’ll discover what you like and dislike, what works for your home, and what doesn’t. Many of these methods are cheap (or free!) and can be setup temporarily, so you can risk trying it out.
You might even try more than one method. At our house, we have indoor worm bins and outdoor wire bins, heaps, and sheet mulch. All of them fill a specific need and help us reach our goals for the garden.
Let’s take a closer look at each of the 17 compost (or compost-like) methods from the infographic. I’ll include links to tutorials and other related resources. Starting at the top and moving clockwise, here we go…
This post is an excerpt from our Happy Garden Guide to Composting digital book. In this book, you’ll also find pros and cons for each method, along with a step-by-step action plan to start composting (or improve your practice!).
1. Community Compost
More and more municipalities offer green waste pickup. Some even do city-wide composting! You can start by searching for “compost service near me.” If your city doesn’t offer composting, look into three other “Community Compost” possibilities:
- Private company – Compost Now is one example with multiple locations. You pay for the service, like other utilities, and get finished compost as part of the deal.
- Community garden – If your neighborhood has a community garden, they likely have compost piles, too. Connect with the garden leaders to see if you can contribute kitchen or yard waste to their efforts.
- Local farmer – You might also be able to find a farmer or gardener in your community who would add your green waste to her compost pile. Growers’ Markets are a great place to connect and support these farmers in your region!
2. Bokashi
A bokashi bucket is not technically* composting, but it is a good way to recycle your food waste in small spaces indoors. Bokashi buckets use anaerobic bacteria (in the form of inoculated bran you sprinkle over scraps) to ferment waste. The waste is basically pickled! The results are acidic organic matter that can be dug into the soil or added to a traditional compost pile.
*Technically, compost is the process of aerobically decomposing organic materials. Aerobic = with oxygen. Aerobic microbes need air and moisture to do their job, and they create heat as they work. Thus, a purist’s compost pile would always have plenty of air and water and get hot for an extended period of time. We’re using a looser definition here to describe the wide variety of ways to break down organic matter, although that “perfect” compost pile can happen using several of these methods!
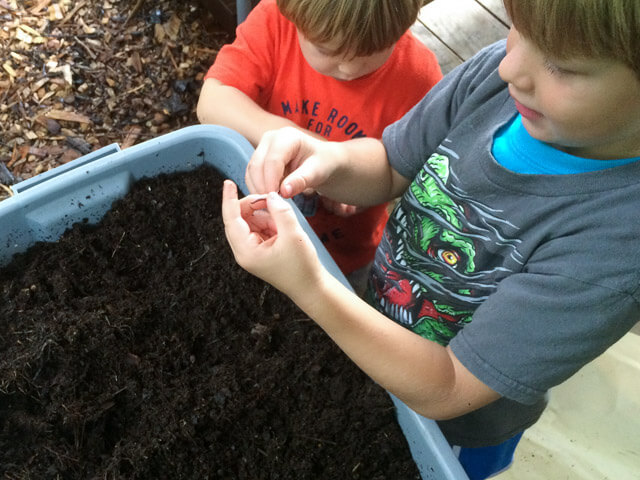
3. Worm Bin
If you don’t mind handling earthworms occasionally (or often, if you have curious kids), a worm bin is a fascinating way to recycle food waste indoors. Vermicomposting, the official term for the process, can happen in fairly small spaces, too. Here’s our step-by-step tutorial for a DIY version that fits under your sink: How To Make a Simple Worm Bin.
4. Green Cone
Green cone digesters are another sustainable way to dispose of food waste. The cones are partially buried in the ground. The top opens and you drop food scraps inside. The buried part of the cone is a plastic mesh basket that soil microbes and worms can move through to digest the food.
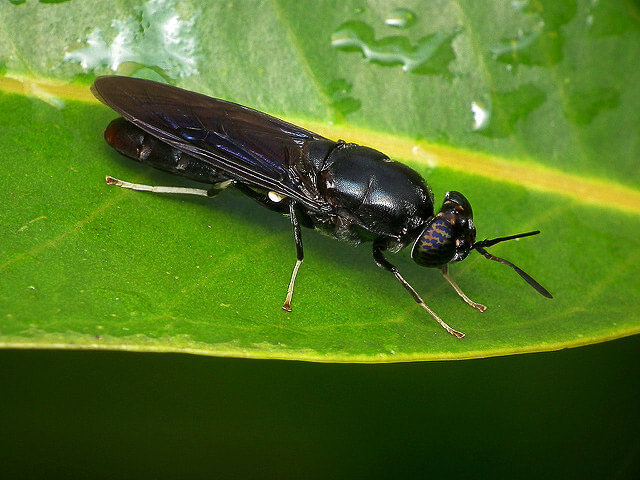
An adult black soldier fly (James Niland/Flickr)
5. Black Soldier Flies
While these are a sidenote in the infographic, allow me to give you a quick introduction to the black soldier fly. This little native insect can be part of a food waste recycling system that creates animal food and fertilizer.
You can purchase or build a bin to house the grub-like fly larvae while they eat food waste. They leave behind nutrient-rich frass and liquid.
Thanks to the larva’s instinct to pupate in a dark, dry place, you can design a self-harvesting system. The larvae climb up out of the food bin to pupate and fall into a collection bucket. You can feed them to chickens, fish, or other animals. (If some of the larva succeed in pupating, don’t worry. The adults are not annoying like house flies. They live for about a week finding mates and laying eggs.)
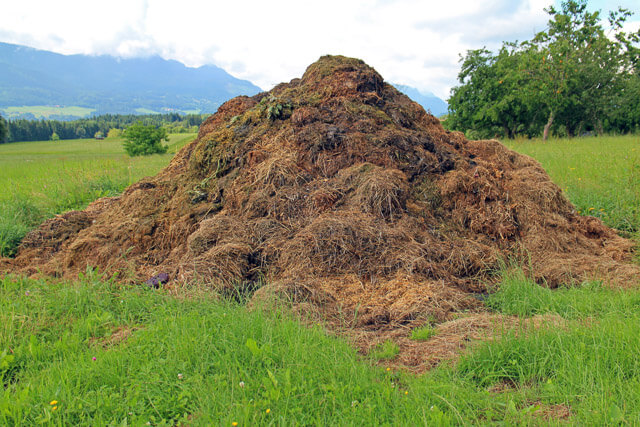
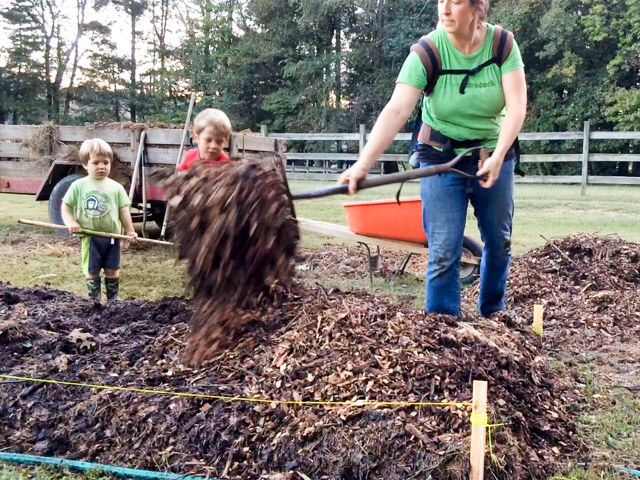
6. Heap
The simplest version of composting! Pile up organic waste and wait. 🙂
You can create good compost quickly using the Berkeley Method for your heap. By “hot composting,” you get finished compost in about 18 days, and you don’t have to worry about weed seeds or pathogens surviving the process.
Then again, you can be a laid-back composter with a heap. Aim to pile it up at least 3 feet high by 3 feet around, and then let nature do the work over the next 6-12 months. (Just be sure you’re not putting in diseased or seedy plants!)
7. Sheet Mulch
Sheet mulch or sheet compost puts your organic waste right onto a future growing space. It’s a great way to build soil while smothering weeds. You’ll find the scoop on a bed we made this fall in our Sheet Mulching Tutorial: How to Start a Garden Without Tilling or Digging.
8. Trench or Pit
Trench and pit composting are pest-resistant versions of the heap that put the finished compost right where you’ll grow. Dig a trench or a hole a few feet deep. Fill it with organic waste and cover it with at least six inches of soil. The bacteria and worms will start breaking down your waste in no time!
Pit composting can be used in small spaces since you can dig a small, deep hole using post hole diggers. David the Good, author of Compost Everything: The Good Guide to Extreme Composting, used this technique to make melon pits.
Trench/pit composting works for pretty much any kind of kitchen waste, even meat and dairy. One word of caution: Avoid adding weedy or diseased plants to your trench. The trench probably won’t get hot enough for long enough to kill pathogens and seeds.
Read more: Guerrilla Composting: How to Recycle Food Waste without a Compost Bin

Three-bin compost system made from recycled wooden pallets (s pants/Flickr)
9. Upcycled Pallet Bin
At our house in Albuquerque, I made a three-bin system using old pallets and a handful of decking screws. Super easy, super cheap, and it held a LOT of material!
Look for pallets with an “HT” stamp. “HT” stands for heat-treated (versus chemically-treated). Three pallets is enough to get you started with a single bin. A fourth gives you a door! Collect seven to ten pallets to make a three-bin system.
10. Chicken Corners
Have chickens? Put them to work making compost!
Justin Rhodes, creator of Permaculture Chickens, has shared his Chicken Corners composting system. He’d build a pallet bin in a corner of his chicken run. After he filled the bin, he removed the pallets and let the chickens scratch and turn the compost-in-process, eating larva and grubs they found. He’d set the pallets up in the next corner and repeat. The temporary corners worked since he also moved his chicken run often. At the time, he could make a cubic yard of compost in a week!
If you have a more permanent run for your chickens, you can use this idea too! Toss food and yard waste into the chicken run. Add dry-ish bedding material (wood shavings or leaves) so that it doesn’t get gross. Over time and with moisture, the bedding and manure and any leftover organic waste will decompose.
Since you have a constant input of food and manure, you won’t be scooping mature, finished compost from this system. However, you can use it as nutrient-rich mulch, pile it near the garden for a final round of decomposition, or add it to your beds allowing a few weeks for it to break down before you plant.
11. Concrete Bin
A compost bin made from concrete blocks won’t rot and it’s fairly simple to build. Here’s a plan for a single bay that you could expand to three or four bays. If you dry stack the blocks, you can move it if your garden plan changes in the future.
If you live in a rocky place, you could use the rocks you pull out of garden beds to create the walls of your bin.
12. Cedar Wood Bin
Since cedar is rot-resistant, it’s a good choice for wood when you build a bin from scratch. It’s more expensive than a softwood like pine, but it will last a lot longer (ten years or more). You can find plans online to build your own elegant wooden bin, like this one.
Not a do-it-yourselfer? You can find cedar bins for sale at many garden supply companies.
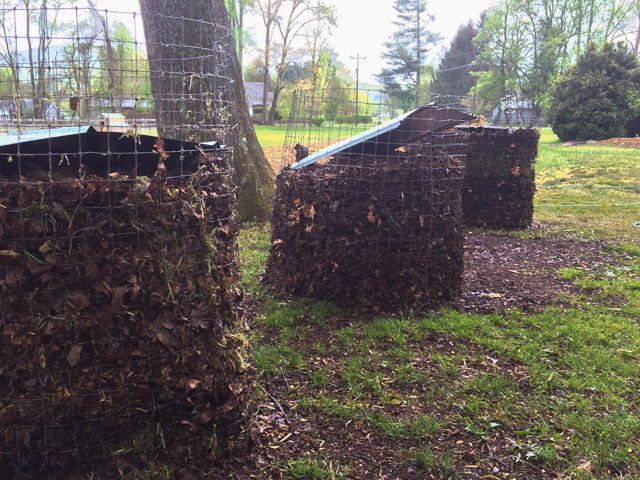
13. Wire Bin
Wire bins are our top choice for composting. They are easy to make, inexpensive, long-lasting, and portable. In Lesson 2 of our Quick Start to Composting Course, I show you how to set one up at your home.
You can use wire mesh with a 1/2 inch or smaller grid (a.k.a. hardware cloth) and add a top and bottom panel to you make your bin pest-proof. You can also add wire mesh to a wooden bin to make it pest-proof.
14. Plastic Composter
Do you need to buy plastic stuff to be a successful composter? Absolutely not. In fact, I encourage you to choose a compost method that uses repurposed or recycled materials.
But if you have serious concerns about rodents or other pests that are stopping you from composting (before you’ve even started!), you should consider a plastic composter. Look for a design that uses heavy-duty recycled plastic to reduce the impact of your purchase.
Be careful not to overwhelm the composter with too much fresh “green” material from your kitchen—it could get stinky fast! Keep “brown” materials (like leaves or straw) on hand to mix as you fill the composter. After a couple months, you’ll be able to scoop older decomposed material from the hatch at the bottom, as you keep adding new waste through the top.
A big compost tumbler! (James Emery/Flickr)
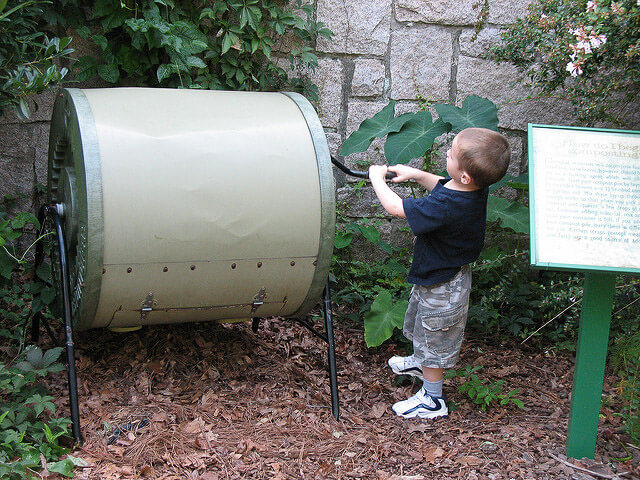
15. Tumbler or Ball
A compost tumbler or ball is another pest-proof possibility. Plus, they add the fun of rolling the bin or ball.
Again, look for a heavy-duty recycled plastic to reduce the impact of your purchase. I suggest finding a dual-batch tumbler with two compartments, or buying a second ball. This allows you to fill one, while the other is composting.
Tumblers and balls are usually not large enough to compost large amounts of yard waste or animal bedding. But if your goal is to recycle your kitchen waste, a tumbler or ball might be just the right compost method to get you rolling.
16. Leaf Mold
If you have an abundance of leaves and a shortage of nitrogen-rich materials (like kitchen waste and animal manure), you can still create rich organic matter for your garden. Leaf mold (or leaf mould in the U.K.) is simple and inexpensive to make.
For best results, you’ll want to shred the leaves with a lawnmower, wet them down, and pile them up. You can use one of the bins we’ve already talked about to hold the decomposing leaves. While the result isn’t as nutrient-rich as compost, leaf mold is a great mulch and soil amendment.
17. Humanure
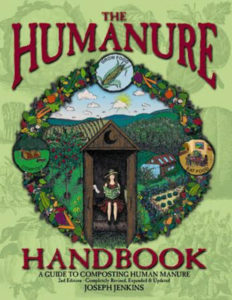 For most of humankind’s history, we’ve been composting our own waste in one way or another. Today, we might think, “Yuck!” but it’s also yucky to use thousands of gallons of potable water to flush away our poo and pee. That’s a fairly recent and not-so-sustainable development.
In his Humanure Handbook, Joseph Jenkins make a compelling case for composting your own waste. When you’re ready to consider composting all the things, you can read an older edition of his book for free online or purchase the latest edition. (We’ve used his system, and it works well!)
In Summary
Composting can be done in so many ways, but don’t let the possibilities overwhelm you. Choose a method and try it out. Make the decision to start today!
Let us know, which compost method is best in your opinion? If you already compost, what’s your favorite approach? We’d love to hear your thoughts in the comments below.
And a quick final reminder…you can get a printable PDF of the Compost Method Infographic here.
There are many things to learn, so much information on it.
Best regards,
Abildgaard Henneberg
Thanks for all the good info. I’m about a month in and it seems to be going well. Just picked up two bales of hay that were recently decoration; a gold mine! My question is, can you use stale or old breads, and if so, carbon or nitrogen? Thanks in advance.
I have two compost bins used pallets to make them. I clean out my chicken roost daily and chicken run. I use the small shavings in my chicken roost and house sand in the run so I get actual chicken poop from in there and a small amount of shavings with it from the roost and chicken house. I put other things in with it grass clippings and scraps. How do I know if things in it are killed like if worms etc don’t see any in chicken poop and it’s ready for the garden? When do you put it on your garden ? Can I put it on in the fall the one bin I started in July . Thanks for all answeres
Hi Cheryl! You can be confident that pathogens and parasites have been killed with temperature and time. Aim to get the internal temp of your pile up to 120+ degrees F for a few days. Since the inner portion will be hotter than the outer, you could monitor and when the temp starts to decrease, turn the pile “inside out” to get the outer material into the center. The oxygen from turning (plus water if the pile isn’t damp) should kick start the thermophilic bacteria again.
And/or to go the time route, you can let the pile age undisturbed for at least a year. (When we know we’ll want to use our compost the nextn growing season, we go for turning and monitoring the temps. Otherwise, we’re a little more laid back – building a pile with plenty of greens/browns, then “set it and forget it” for the year! With occasional watering in very dry seasons.)
You also asked “When do you put it on your garden?” and that can be anytime! I like to add compost in the spring when I plant, but if I have it available, I’ll also use it as mulch in summer/fall to protect and feed the soil.
So in thinking a bit more about your situation as you’ve described it here, this is what I’d do…
1. If unsure that your current piles have gotten hot enough, turn all the material and combine it in one of your bins. Water well.
1b. Stop adding new material to this one. Get your second bin ready with a layer of coarse materials and start adding new manure, etc. there. (see 5 for more.)
2. Get a compost thermometer and take the temperature every few days. If it’s not heating up, you’ll need more water or nitrogen. (With chicken manure, you probably won’t need N!) If it’s getting extremely hot (over 160 degrees F), you need some more carbon – dried grass, old straw, shavings – to get it more balanced.
3. Once you have 120 for a few days, turn the pile, aiming to get the outer layers to the bottom/center.
4. Now let it breakdown until you need it. If you want it faster, turn it regularly. If you’re good to wait until spring, just let it sit.
5. With your “new” bin, you could put a layer of shredded leaves or old straw at the bottom and around the sides so that your manure is always added to the center. This will let you keep the pathogen/parasite risk low because that middle part of your pile will stay hotter. Keep an eye on it and add water if needed. Mix in some leaves/shavings in the center if it seems slimy or stinky – anerobic egg/sulpher smell.
6. Once this second bin is full, switch to using your first one (which will be finished at that point) and repeat. 🙂