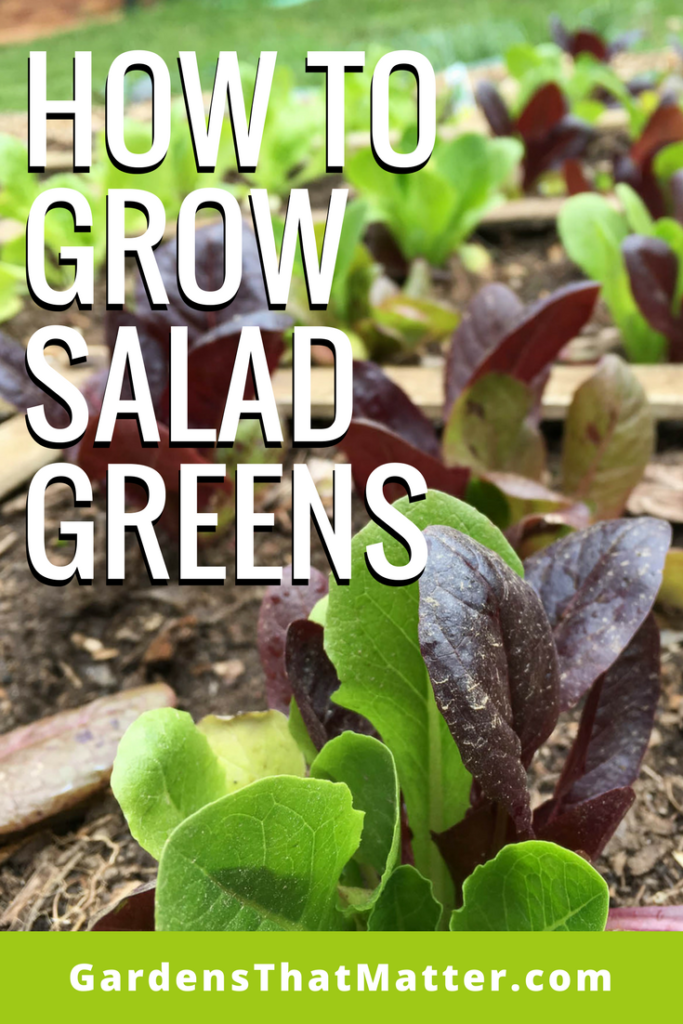
How to Grow Salad Greens in Your Garden or Containers
Leafy greens pack a punch when it comes to healthy eating, and they’re easy to grow yourself. Let’s talk about how to grow salad greens (and more)
in a corner of your backyard garden, a raised bed, or containers. You can start harvesting small salads within a month and by week six, you’ll have a steady supply!
Ready to say good-bye to those expensive plastic-shell-packed salads from the store? When you grow your own, you’ll save money, reduce packaging, and have an abundance of fresh, colorful food just outside your door. It’s easy for the whole family to help, and I love how the kids (and adults) can browse from this bed anytime they’re playing near the garden.
Plus, greens are great for more than just salad. I sneak add them into everything from stir fries to soups to smoothies for the vitamins, fiber, and flavor.
In this tutorial, I’ll show you how to start a spring garden bed for salad greens in 9 simple steps.
1. Choose Your Garden’s Location
The plans in this tutorial will help you plant a 4-foot x 6-foot area—you can use an in-ground bed, a semi-sunny corner of your existing landscape, or a raised bed. You can also scale back the plans to grow in a group of containers.
If you’re starting a new garden bed, you’ll need to figure out where it goes. Keep it convenient with easy access to water and around 8 hours of sunlight each day. We’ll look at how to prepare the soil in Step 4.
If you use containers, situate them in a spot with similar conditions. Easy water access is even more important for containers, which dry out more quickly than in-ground beds.
Are sunny spots hard to find in your yard?
You’re in luck! Greens can make do with as few as 4 hours of sunlight, although they’ll grow more slowly in this much shade. On the plus side, as the weather heats up, the greens in these shady spots will be slower to bolt into flower.

A CLASS FOR NEW GARDENERS
Start Your First Garden
Short, actionable lessons to help you grow healthy food and flowers using sustainable methods. No green thumb required.
2. Pick Your Plants
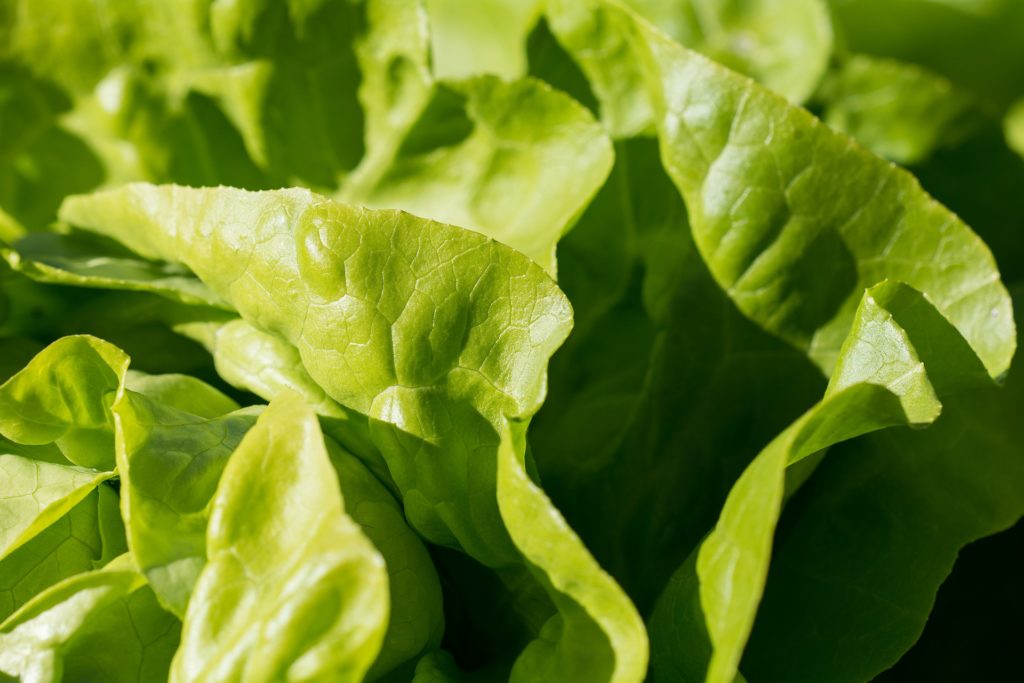
If this is your first time to grow salad, you may be amazed by the options you have beyond iceberg, romaine, spinach, and “baby greens.” Even after growing greens for years, I get excited about the incredible shapes, sizes, and flavors available. The lettuces and leafy greens pages are some of my favorite sections of seed catalogs.
Today, I’ll focus on standard plants and varieties that are available at most nurseries and garden centers. Feel free to expand and get creative based on what’s available to you!
You’ll want to plan based on a few factors:
- Your Preferences. If you love romaine, grow it! You don’t want a whole bed of unusual greens only to find they’re too bitter or peppery for your family’s taste.
- Variety. While you want to grow lots of familiar favorites, be sure to experiment with a few new plants. The biodiversity means you’ll have something in the mix that can withstand unusual temperatures, drought, or rainfall. Include a few companion herbs and edible flowers to help “hide” your greens from pests, provide food for pollinators, and add interest to your salad bowl.
- Season. Many types of salad greens are cool-weather crops, and best grown in spring and fall. However, that doesn’t mean you can’t have a salad garden in summer. You just have to find some summer lovin’ salad greens.
- Local Availability. Find a local source of seeds and starts whenever possible. These plants will be better adapted for your regional growing conditions, and the company or farmer can be a great resource for you as a gardener. If you buy starts that have been inside a greenhouse, you may need to harden them off before putting them out in spring.
With these factors in mind, make a sketch of what you’d like to grow. Then, figure out how many seed packs or starts you need and make your shopping list.
For this sample garden, I’ve selected plants that are easy to find in spring, and I’m using starts here for the instant gratification factor, but you can start from seed as well.
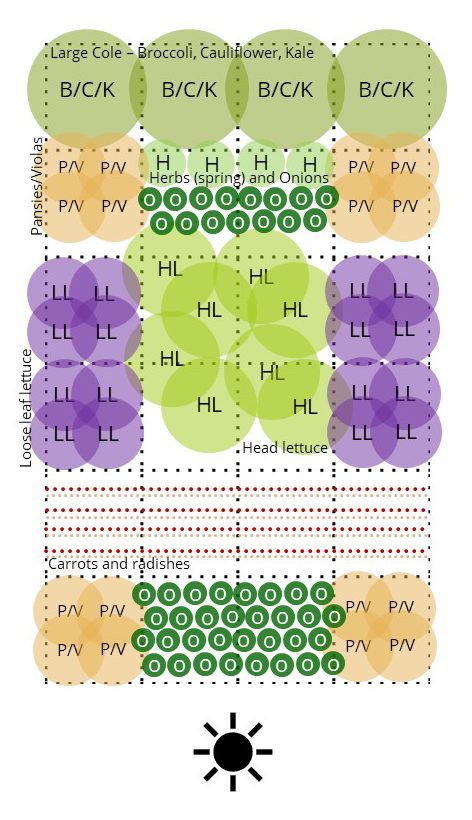
Here’s what you need for a 4′ x 6′ space:
- Lettuce, loose leaf – 16 starts
- Lettuce, head – 8 starts
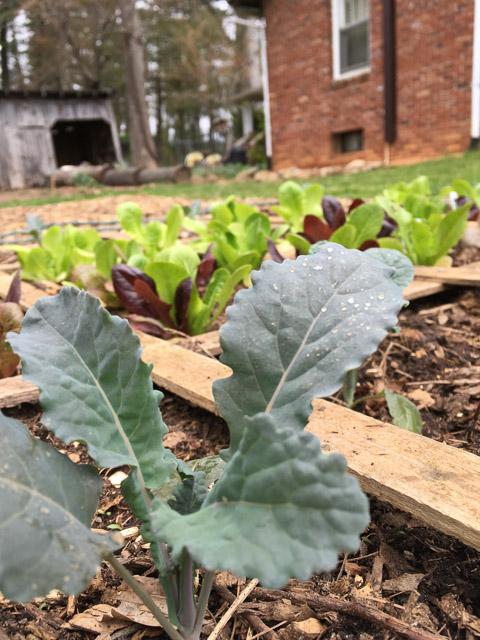
- Large “cole” plants, like broccoli, cauliflower, or kale – 4 starts
- Onions, green or regular – sets or seedlings
- Pansies and/or violas – 20 starts
- Annual herbs – 4 starts (cilantro, dill, borage, or chamomile all work well in spring)
- Radishes – 1 seed pack (at least 1 gram)
- Carrots – 1 seed pack (at least 1/2 gram) – Short “stubby” varieties work best in most soils.
3. Gather Supplies
- Starts or seeds – Use your plan from Step 2 to make a shopping list.
- High-quality compost – This is the key to healthy, living soil both in the ground and in homemade soil mixes for containers or raised beds. Here are a few tips for buying it, but be sure you also start making your own as well. Our Happy Garden Guide to Composting can help.
- Digging fork
- Newspaper (optional) – Use for weed barrier around plantings
- Trowel or digging knife
- Watering can or hose with sprinkling head attachment
- Mulch – I recommend unsprayed grass clippings or alfalfa hay (lucerne) for a nitrogen-rich mulch material. Other good mulch options for a salad greens garden are nearly-finished compost, unsprayed straw or shredded leaves.
For containers or raised beds, you’ll also need…
- Coconut coir and vermiculite – DIY soil mix – We like to use equal parts coconut coir, vermiculite, and compost in our soil mixes for containers and raised beds
OR - High-quality potting mix – You’ll want an organic potting soil, which actually doesn’t have any soil most of the time. Mix makes use other ingredients to keep the mix light enough for containers. For raised beds, you could consider getting a topsoil/compost mix in bulk from a local landscaping company.
Later…
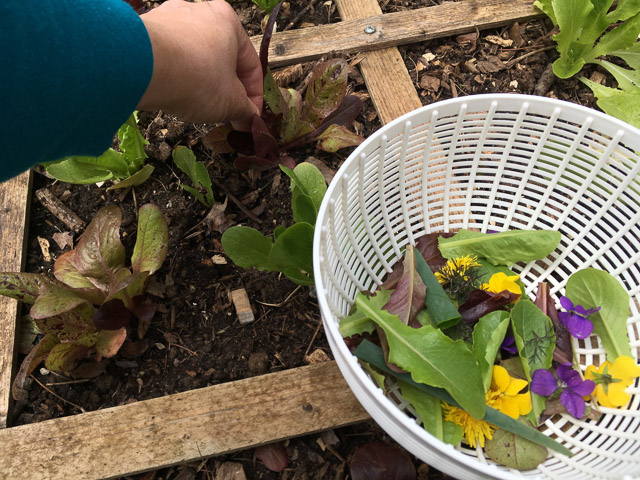
- Salad spinner and scissors – To harvest, I like to pinch or clip off leaves and drop them right into a salad spinner basket. It’s easy to carry to the garden and then back into the house to wash and spin!
4. Prepare the Growing Area
For existing in-ground and raised beds, peel back any mulch you have on the bed temporarily and remove any weeds that have popped up. Add 1-3 inches of compost and any amendments needed. (A soil test can help you determine if you need any amendments.)
Loosen the soil with the digging fork. No need to turn or actively mix. We’re just opening up spaces and lightly incorporating the compost and amendments.
For new in-ground beds, we used to use John Jeavons’s double digging technique initially and then move to a no-dig system with deep mulch. Lately, we’ve been aiming to go no-till from the beginning with a simple sheet mulch.
For new raised beds, here’s a raised bed tutorial to create a simple one.
For containers, get the soil mix evenly moist (but not dripping wet) and then fill the containers. If you’re using starts, leave about 5 inches of empty space at the top. You’ll add mix to this area as you tuck in the starts.
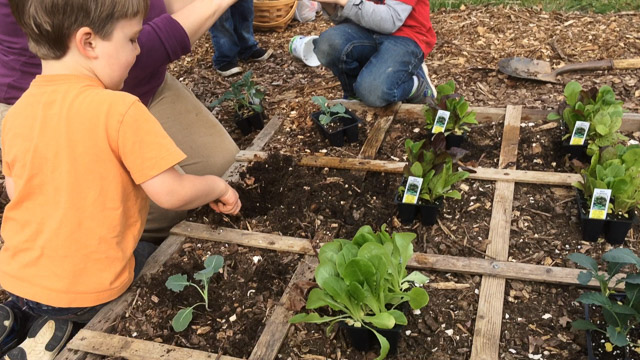
5. Plant!
Use your sketch and any additional info on the seed pack or tag to arrange your plants. Because you’ll be harvesting salads as the plants grow in, you can plant densely. You’ll automatically be thinning as you eat!
Plant the shorter varieties on the sunward side (south in Northern Hemisphere; north in Southern).
Using squares or rows to organize is helpful for knowing which plant is which. But if you and your family feel confident about plant ID, you can mix things up in a lively polyculture mosaic.
Here are planting notes for our sample plants:
- Lettuce, loose leaf – 6-8″ centers
- Lettuce, head – 8-12″ centers (Full heads need about 12″ to grow, so be sure to pull some of the heads early to allow others to grow to full size.)
- Large “cole” plants, like broccoli, cauliflower, or kale – 12″ centers
- Onions – 3″ for green, 4″ for bulbs
- Pansies and/or violas – 5″
- Annual herbs – 4-6″
- Radishes – 2″
- Carrots – 3″ (Plant radishes and carrots intermixed. The radishes will break through the soil first, making way for carrots. Then, you can include young carrot and radish greens in your salads to thin them out.)
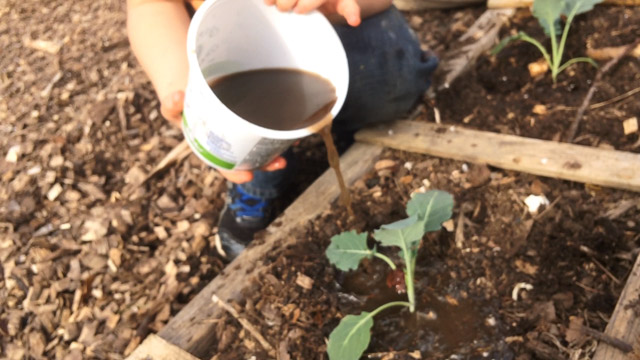
6. Water
Water the new starts in well. We used a vermicompost extract to water our seedlings in. (This extract is simply a few scoops of worm castings in water stirred vigorously to dissolve the water-soluble nutrients.)
Keep seeded areas evenly moist until the seeds germinate. Then you can move to less frequent, deeper watering.
7. Mulch
You can start with light mulch right away. If you tend to have lots of weeds in your garden, you can use a few sheets of newspaper as a weed barrier. Arrange the newspaper between seedlings or on either side of seeded areas. Wet it thoroughly, and cover with mulch.
With starts or soon as the seedlings are up, you can mulch more heavily between plants. This will conserve moisture and discourage weeds. Don’t pile mulch up right around the stems of plants…this is an invitation to slugs, snails, and fungal diseases!
Again, I recommend unsprayed grass clippings or alfalfa hay (lucerne) for a nitrogen-rich mulch material. Other good mulch options for these veggies are nearly-finished compost, unsprayed straw or shredded leaves.
8. Tend
Water the bed as needed. Pull any weeds that make it through your mulch. Greens grow best in soils with adequate nitrogen, so you may want to give the soil life a boost with compost tea or an organic liquid fertilizer, especially if you notice any nutrient deficiencies like yellow leaves or other symptoms.
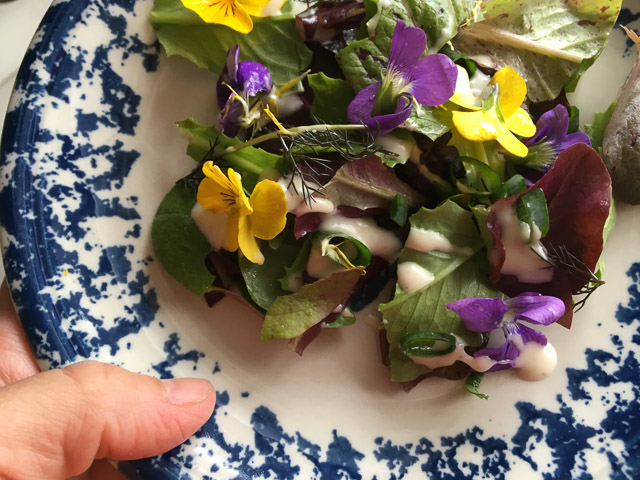
9. Harvest
Time for the yummy part! You can start to harvest within a month or so, plucking off outer leaves or thinning out plants at first. As the plants get bigger, your salads can get bigger.
Here are a few harvest notes on our sample garden:
- Lettuce, loose leaf – Often called “cut and come again,” you can cut these plants above the growing point (an inch or so above the soil) and they’ll come back. When the weather heats up, allow a few of these to grow flowers and set seed you can save for next year.
- Lettuce, head – While you wait for the heads to develop, you can harvest some of the outer leaves to eat right away. Also, be sure to harvest a few heads when the plants are small to allow the other plants to grow larger heads.
- Large “cole” plants, like broccoli, cauliflower, or kale – You’ll harvest broccoli and cauliflower when the flower buds start to form. Don’t wait too long or you’ll have tough heads! For kale, you can harvest leaves from the stem throughout the season. It may get a little rough mid-summer, but we often let kale plants hang on and see a great burst of new leaves in fall.
- Onions – Clip off scallion-style greens anytime after the onions get started. For bulbs, don’t clip the leaves, wait until the tops yellow and start to fall over. Then pull!
- Pansies and/or violas – Eat the flowers from pansies and violas anytime. If you’re not eating them, a few minutes of “dead heading” will keep them blooming well into summer.
- Annual herbs – Clip leaves from the herbs anytime. With warming days, you’ll see them bolt to flower and set seed. Often the flowers and seeds are edible, too, so read up on the herbs you picked to see if yours are!
- Radishes – Eat the greens raw when they’re young. As the older leaves get hairy, you can still eat them after cooking. Pull radishes as they develop to add to your salad. And if you miss a few radishes, you can let them flower and set seed. The flowers and seed pods add that same spicy hint as the radish!
- Carrots – Carrot greens are edible, so you can pick some for your salad, especially if you need to thin out the planting. Older greens benefit from cooking first. Just be sure to leave some plants intact so they can use those leaves to collect energy and grow the carrot root!
(Pssst…if you love the idea of growing greens, but this all seems overwhelming, you might like to try growing microgreens in a container first!)
Now, I’d love to hear from you…
Have you grown your own salad before? What varieties are your favorites and which new ones do you want to try? Tell me in the comments below. Feel free to share suggestions you have for other gardeners, too!
Thank you so much for these tips. I am very much wanting to grow a salad greens garden. Don’t have much space and the deer eat everything I plant. My carrots I planted last year in a pot didn’t do well. I think this year I want to major on peppers and lettuces and cucumbers. Mostly I need a way to keep the deer out. Please send me the year-round plan for the salad greens garden. Appreciate all your tips.
Thanks for letting me know, Margaret! Deer…especially hungry/thirsty deer…can be a frustrating challenge for gardeners. If your garden is fairly small, you’ll have the most luck with protecting your most prized plants with a removable mesh top or fencing. While deer are happy to eat most of the things we eat, there are a few edibles that are less palatable for them – aromatic herbs, onion family, and tomato family (which includes peppers) are good choices in unprotected spaces.
I would love to have the year round garden plan.
Thanks, Kim!
Amy thanks for the great article!! I feel way less intimidated about growing greens now. One thing: our puppy likes to jump into our raised beds and dig for voles. Would the criss-cross wood pattern you have on your beds deter this? Or should I consider an upside-down piece of hardware cloth or chicken wire (spikes up top) to keep her out? I’ve tried pepper and cayenne and citrus and she could care less. Wanting my greens to thrive!!
My pleasure, Andrea! Thanks for your comment and sorry to hear about the overzealous pest-controlling puppy. 🙂 The wood pattern might slow her down, but she’d be able to work around it. So, first off, can you discourage the voles? Keep areas around beds mowed down or mulched so there’s less cover. Maybe try using a mouse trap (A live trap would be an option to avoid dog nose damage!) and relocate them. (Here’s a good resource about vole vs mole vs shrew that has more control ideas – https://extension.psu.edu/voles.)
Next, I think physically protecting the beds is your best bet – fence the garden in/dog out, where possible. I like your idea of using chicken-wire or hardware cloth to make a pokey mini-fence around a single bed. (Laying down chicken wire on top of soil and letting the plants grow up through it could work if you don’t have root crops. But it still doesn’t stop stomping on plants to try to dig!)
One more idea – a designated digging bed where you can redirect her efforts (plus the kids can dig there!). A nice layer of mulch and some wildflowers growing around it might even make better vole/mole habitat than the garden beds. 🙂
Loved your post. Shame here in Australia we are going into Autumn.
Would absolutely LOVE a year round salad garden plan.
Truthfully I just can’t seem to grow lettuces. Bitter, don’t grow big etc
Maybe more nitrogen and water would help . 😂
Also in our climate they don’t enjoy the heat we get. Seem to prefer some shady plant alongside?
Lots to learn about salad gardens. Thx for your help. Happy gardening.
Thanks, Elle! Autumn can be perfect for greens, so it’s not too late. 🙂 Look for hardier varieties (kales, collards, arugula, spinach) and they’ll get sweeter after a light frost. Many you can overwinter under a cold frame or mulch. Also, you’re right about the heat bringing out the bitterness. Lettuces and many of the greens shift from leaves to flower/seed as fast as they can in the heat, and that means they get bitter. Shady companions are a good idea for the hot season!